How much conduit and cabling should you run before the cinema walls close up?
Once the drywall goes on, every missing cable becomes an expensive problem. Here is the prewire plan an experienced integrator would put in place for a dedicated cinema.
The principle: conduit for anything that will change, cable for what will not
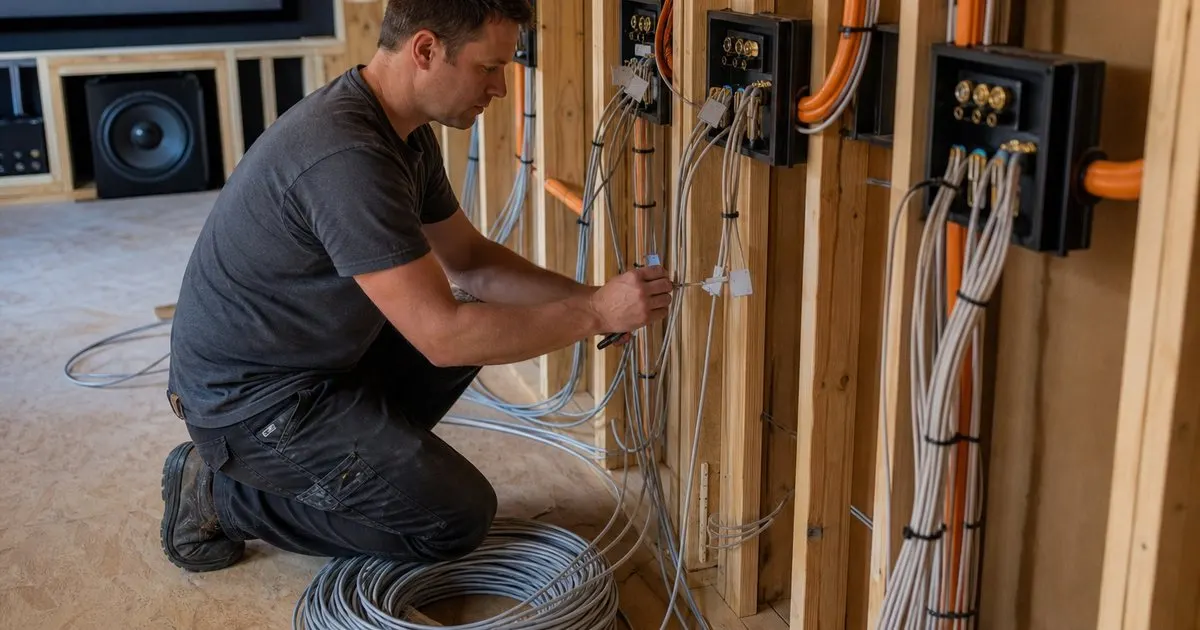
Speaker wire, once installed properly, will outlast several generations of equipment, because the loudspeaker connection has not changed in decades. Video and network cabling is the opposite; the connectors and the bandwidth requirements shift every few years. The planning rule that follows is simple. Pull direct cable for speakers and for low-voltage runs that are unlikely to change, and run conduit for every path that carries video, data, or control, so tomorrow's cable can be pulled without opening a wall. Smooth-wall conduit with a pull string in every run is the standard.
The critical run is between the equipment rack and the projector. A generously sized conduit, in the range of an inch and a half to two inches in diameter with sweeping rather than sharp bends, will accept an HDMI cable with its connector attached, along with control and network cables, and leaves room for whatever replaces HDMI. A second conduit from the rack to the screen wall serves the front speakers, the screen's motor and masking, and any behind-screen subwoofers. If the rack sits in a closet outside the room, a third conduit from the rack to a point just inside the cinema handles everything else. Related: How dark does a dedicated home cinema room need to be?
Keep reading: How dark does a dedicated home cinema room need to be?, Which projector technology delivers the best image in a light controlled room?, What acoustic treatments actually transform a home theater listening experience?. See how Theatrvault helps you an expert guide to designing a true home cinema.
Speaker locations, including the ones you are not installing yet
Wire every speaker position the room could reasonably use, not only the ones in the initial equipment list. That means the three front channels, side and rear surrounds for each row, at least four ceiling height positions, and often front wide positions, since immersive audio formats reward additional channels and a later upgrade is trivial if the wire is already in the wall. Speaker cable of a suitable gauge for the run length, terminated in a labeled backbox or wall plate, costs very little at rough-in and a great deal afterward.
Subwoofers deserve similar foresight. Run a signal cable and a power outlet to each corner of the room and to the midpoints of the side walls, because the best subwoofer positions are found by measurement after the room is built, and the ideal location is rarely where a builder guessed. Seats need service too: powered recliners require an outlet under each seating position, and tactile transducers in the seats or risers need signal cable back to the rack. Running a conduit under the riser to the rack covers all of it. Related: How many seats can a luxury home cinema comfortably accommodate?
Power, separation, and the network
Amplifiers, a projector, and a rack of sources draw meaningful current, and they misbehave on circuits shared with lighting dimmers or motors. Plan dedicated circuits for the equipment rack, another for the projector, and separate circuits for lighting and for motorized elements like the screen and masking. Ask the electrician to keep high-voltage and low-voltage cables on separate paths, crossing at right angles where they must meet, because parallel runs of power and unshielded signal cable invite hum. A whole-room surge protection strategy at the panel is sensible for equipment at this price level. Related: Which projector technology delivers the best image in a light controlled room?
The network is now part of the video path. Streaming devices, the processor, the projector, and the control system all want wired connections, and a wired connection is more reliable than any wireless one behind two layers of drywall. Run at least two network cables to the rack and one to the projector position, plus one to any location where a source might live. Long HDMI runs beyond the reach of copper cable are handled by fiber optic HDMI, which is thin and reliable but directional and generally not field-terminable, another reason the conduit needs to accept a cable with its connectors attached.
Documenting the rough-in before it disappears
The most valuable document in a cinema project is a set of photographs of every wall and ceiling taken after cabling is complete and before drywall, with a tape measure in frame for scale. Combined with a simple drawing that shows every cable's origin, destination, and label, it lets anyone service the room years later without guesswork. Label both ends of every cable with the same identifier, leave generous service loops at each backbox and in the rack, and cap conduits so debris does not fill them during construction.
Add blocking while the framing is open: solid backing for the projector mount, for the screen frame and its motor, for in-wall and ceiling speakers, for wall sconces, and for any acoustic panels that will hang from cleats. A mount fastened to blocking is silent and permanent; one fastened to drywall anchors eventually creaks or sags. None of this is expensive at rough-in. All of it is expensive after the fabric goes up, which is why an experienced integrator walks the room with the framer and the electrician before any wall is closed. Related: What acoustic treatments actually transform a home theater listening experience?
- Run smooth-wall conduit with pull strings for every video, data, and control path, and direct cable for speakers.
- The rack-to-projector conduit should be large enough to accept an HDMI cable with connectors attached, with gentle bends.
- Wire every plausible speaker and subwoofer position now, including height channels and all four corners.
- Photograph and label every run before drywall, and add blocking for the projector, screen, speakers, and sconces.

Julien Jimenez
Julien Jimenez is an independent software builder based in Paris. He designs, ships, and operates focused SaaS products for small businesses and independent professionals. Read the full author page.
A Cinema Kept Behind Your Own Door
An expert guide to designing a true home cinema. Theatrvault is built to help you put this into practice.
Design your cinemaMore from the Theatrvault blog
Get the complete home cinema rooms guide
Our full buying guide, the price guide, and new research as we publish it. One email, no spam, unsubscribe any time.