What is the best way to light a home cinema without washing out the picture?
Lighting in a cinema does more than help people find their seats. Done well, it sets the mood, protects the projected image, and disappears the moment the film starts.
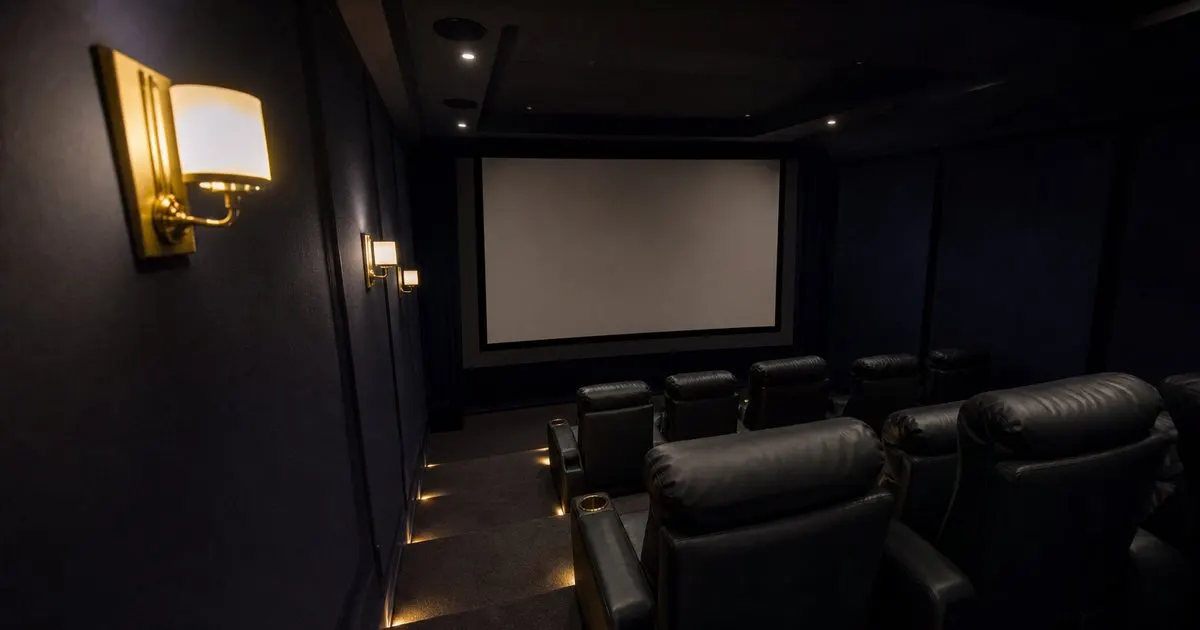
The one rule: no light may reach the screen
Every lighting decision in a projection room starts from a simple physical fact. A projector cannot produce black; it produces an absence of light on a surface, and anything else illuminating that surface fills in the shadows and flattens the image. A wall sconce that spills a little light onto the screen edge, a cove that reflects off a glossy ceiling, a path light aimed slightly upward, each raises the black floor and reduces the contrast you paid for. The best rooms are designed so that, with the film playing, the only light in the room is the light coming back off the screen. Related: How dark does a dedicated home cinema room need to be?
That means fixtures are placed and aimed with the screen in mind. Sconces sit on side walls behind the front row, not beside the screen. Step and aisle lights point down and are shielded. Ceiling fixtures use narrow beams, deep baffles, and dark trims, and they are never mounted in the front third of the room. Surfaces near the screen, including the ceiling above it, should be dark and matte so that reflected light from the picture itself does not bounce back. Lighting and finish selection are the same conversation in a room like this. Related: Which projector technology delivers the best image in a light controlled room?
Keep reading: How dark does a dedicated home cinema room need to be?, Which projector technology delivers the best image in a light controlled room?, What acoustic treatments actually transform a home theater listening experience?. See how Theatrvault helps you an expert guide to designing a true home cinema.
Layering light for a room that changes mode
A dedicated cinema moves through several states in an evening: arrival, pre-show, feature, intermission, and cleanup. Each needs a different amount and quality of light, and layering is how you get there. A typical scheme includes low-level path and step lighting for safety, sconces or cove lighting for atmosphere, a few narrow downlights for reading or tidying, and optionally a fiber optic star ceiling for the pre-show period. Each layer should be on its own dimmable circuit so scenes can be composed rather than simply switched. Related: Should you build a dedicated cinema or a multipurpose media room?
Color temperature matters more than people expect. Warm light, in the range most people associate with candlelight or incandescent bulbs, flatters skin and wood and leather, and it reads as cinematic rather than clinical. Cool, bluish light makes a dark room feel like a waiting area. Choose fixtures with high color rendering so the fabrics and finishes look the way they did in the showroom, and check that every LED source in the room shares a similar tint, because mismatched whites are obvious on dark walls.
Dimming, drivers, and the electrical details that cause problems
Smooth dimming to very low levels is the point of the exercise, and it is where many installations fall short. Not every LED fixture dims gracefully; some flicker, some drop out abruptly at the bottom of the range, and some buzz audibly through their drivers at low output, which in a silent room is unacceptable. Specify fixtures and dimmers that are tested together, and ask the electrician to demonstrate a full dim to near-black with no visible step and no audible hum before the ceiling is closed. Digital control protocols designed for lighting generally behave better at the low end than ordinary phase-cut dimming.
Keep lighting drivers and dimmers away from audio signal paths. Poorly designed dimmers can inject noise into nearby speaker cables and interconnects, which shows up as a buzz through the system. Route lighting wiring on a separate path from low-voltage audio and video runs, and locate driver enclosures outside the isolated shell where their heat and faint hum do not matter. A remote driver location also makes future servicing a matter of opening a closet rather than cutting fabric.
Scenes, control, and the moment the lights go down
The value of layered lighting appears when it is tied to the control system. A pre-show scene brings sconces and cove to a comfortable level while guests settle. Starting the film triggers a slow fade over several seconds, mirroring what happens in a good commercial house, and the aisle lights settle at a barely visible glow. Pausing the film raises the sconces gently. A cleanup scene brings the downlights up fully. None of this requires a complex system, only a lighting controller that can store scenes and accept a trigger from the source or the remote.
A few practical touches distinguish a considered room. Small shielded lights under the front edge of each riser step prevent stumbles without lighting the ceiling. A dim indicator near the door helps latecomers. Blackout treatment on any window, sealed at the edges, is part of the lighting design rather than an afterthought. And it is worth walking the finished room in feature mode with the projector showing a dark scene, looking for any glow that should not be there; that final check catches the one downlight trim or path fixture that was aimed a few degrees wrong. Related: What acoustic treatments actually transform a home theater listening experience?
- Place and aim every fixture so that no direct or reflected light reaches the screen during the feature.
- Layer path, sconce, cove, and task lighting on separate dimmable circuits with warm, consistent color.
- Test dimming to near-black for flicker and buzz before closing the ceiling, and keep drivers away from audio wiring.
- Tie the layers to stored scenes so the lights fade automatically when the film starts and rise gently when it pauses.

Julien Jimenez
Julien Jimenez is an independent software builder based in Paris. He designs, ships, and operates focused SaaS products for small businesses and independent professionals. Read the full author page.
A Cinema Kept Behind Your Own Door
An expert guide to designing a true home cinema. Theatrvault is built to help you put this into practice.
Design your cinemaMore from the Theatrvault blog
Get the complete home cinema rooms guide
Our full buying guide, the price guide, and new research as we publish it. One email, no spam, unsubscribe any time.